Provisioning on AWS
Quick Installation
Porter provisions infrastructure in your own AWS account through the AssumeRole operation.
Simply put, Porter can assume the role that you create in your own AWS account as long as you declare that you trust Porter to do so.
This eliminates the need to rely on static AWS credentials and makes it easier to revoke access for security purposes. Porter creates a CloudFormation to manage this role in your account using 3 simple steps.
The IAM role Porter creates must be kept in your AWS account for Porter to keep managing your infrastructure. Deleting this role will cause Porter to fail and stop managing your infrastructure.
- After selecting AWS as your cloud provider you will be prompted to login to your root AWS account. Upon successful login you will be prompted to provide the AWS Account ID of the account in which you wish to provision your cluster in. You can find your Account ID at the top right corner of your AWS console. Input your Account ID and click on Grant Permissions.

- You will be directed to your AWS console to create a CloudFormation stack. This stack will create the role Porter will assume to manage your infrastructure. Scroll to the bottom of the screen. Check the “I acknowledge…” box and click on Create Stack. It may take a few minutes for the role to be fully created. After creation you can proceed to selecting provisioning settings.
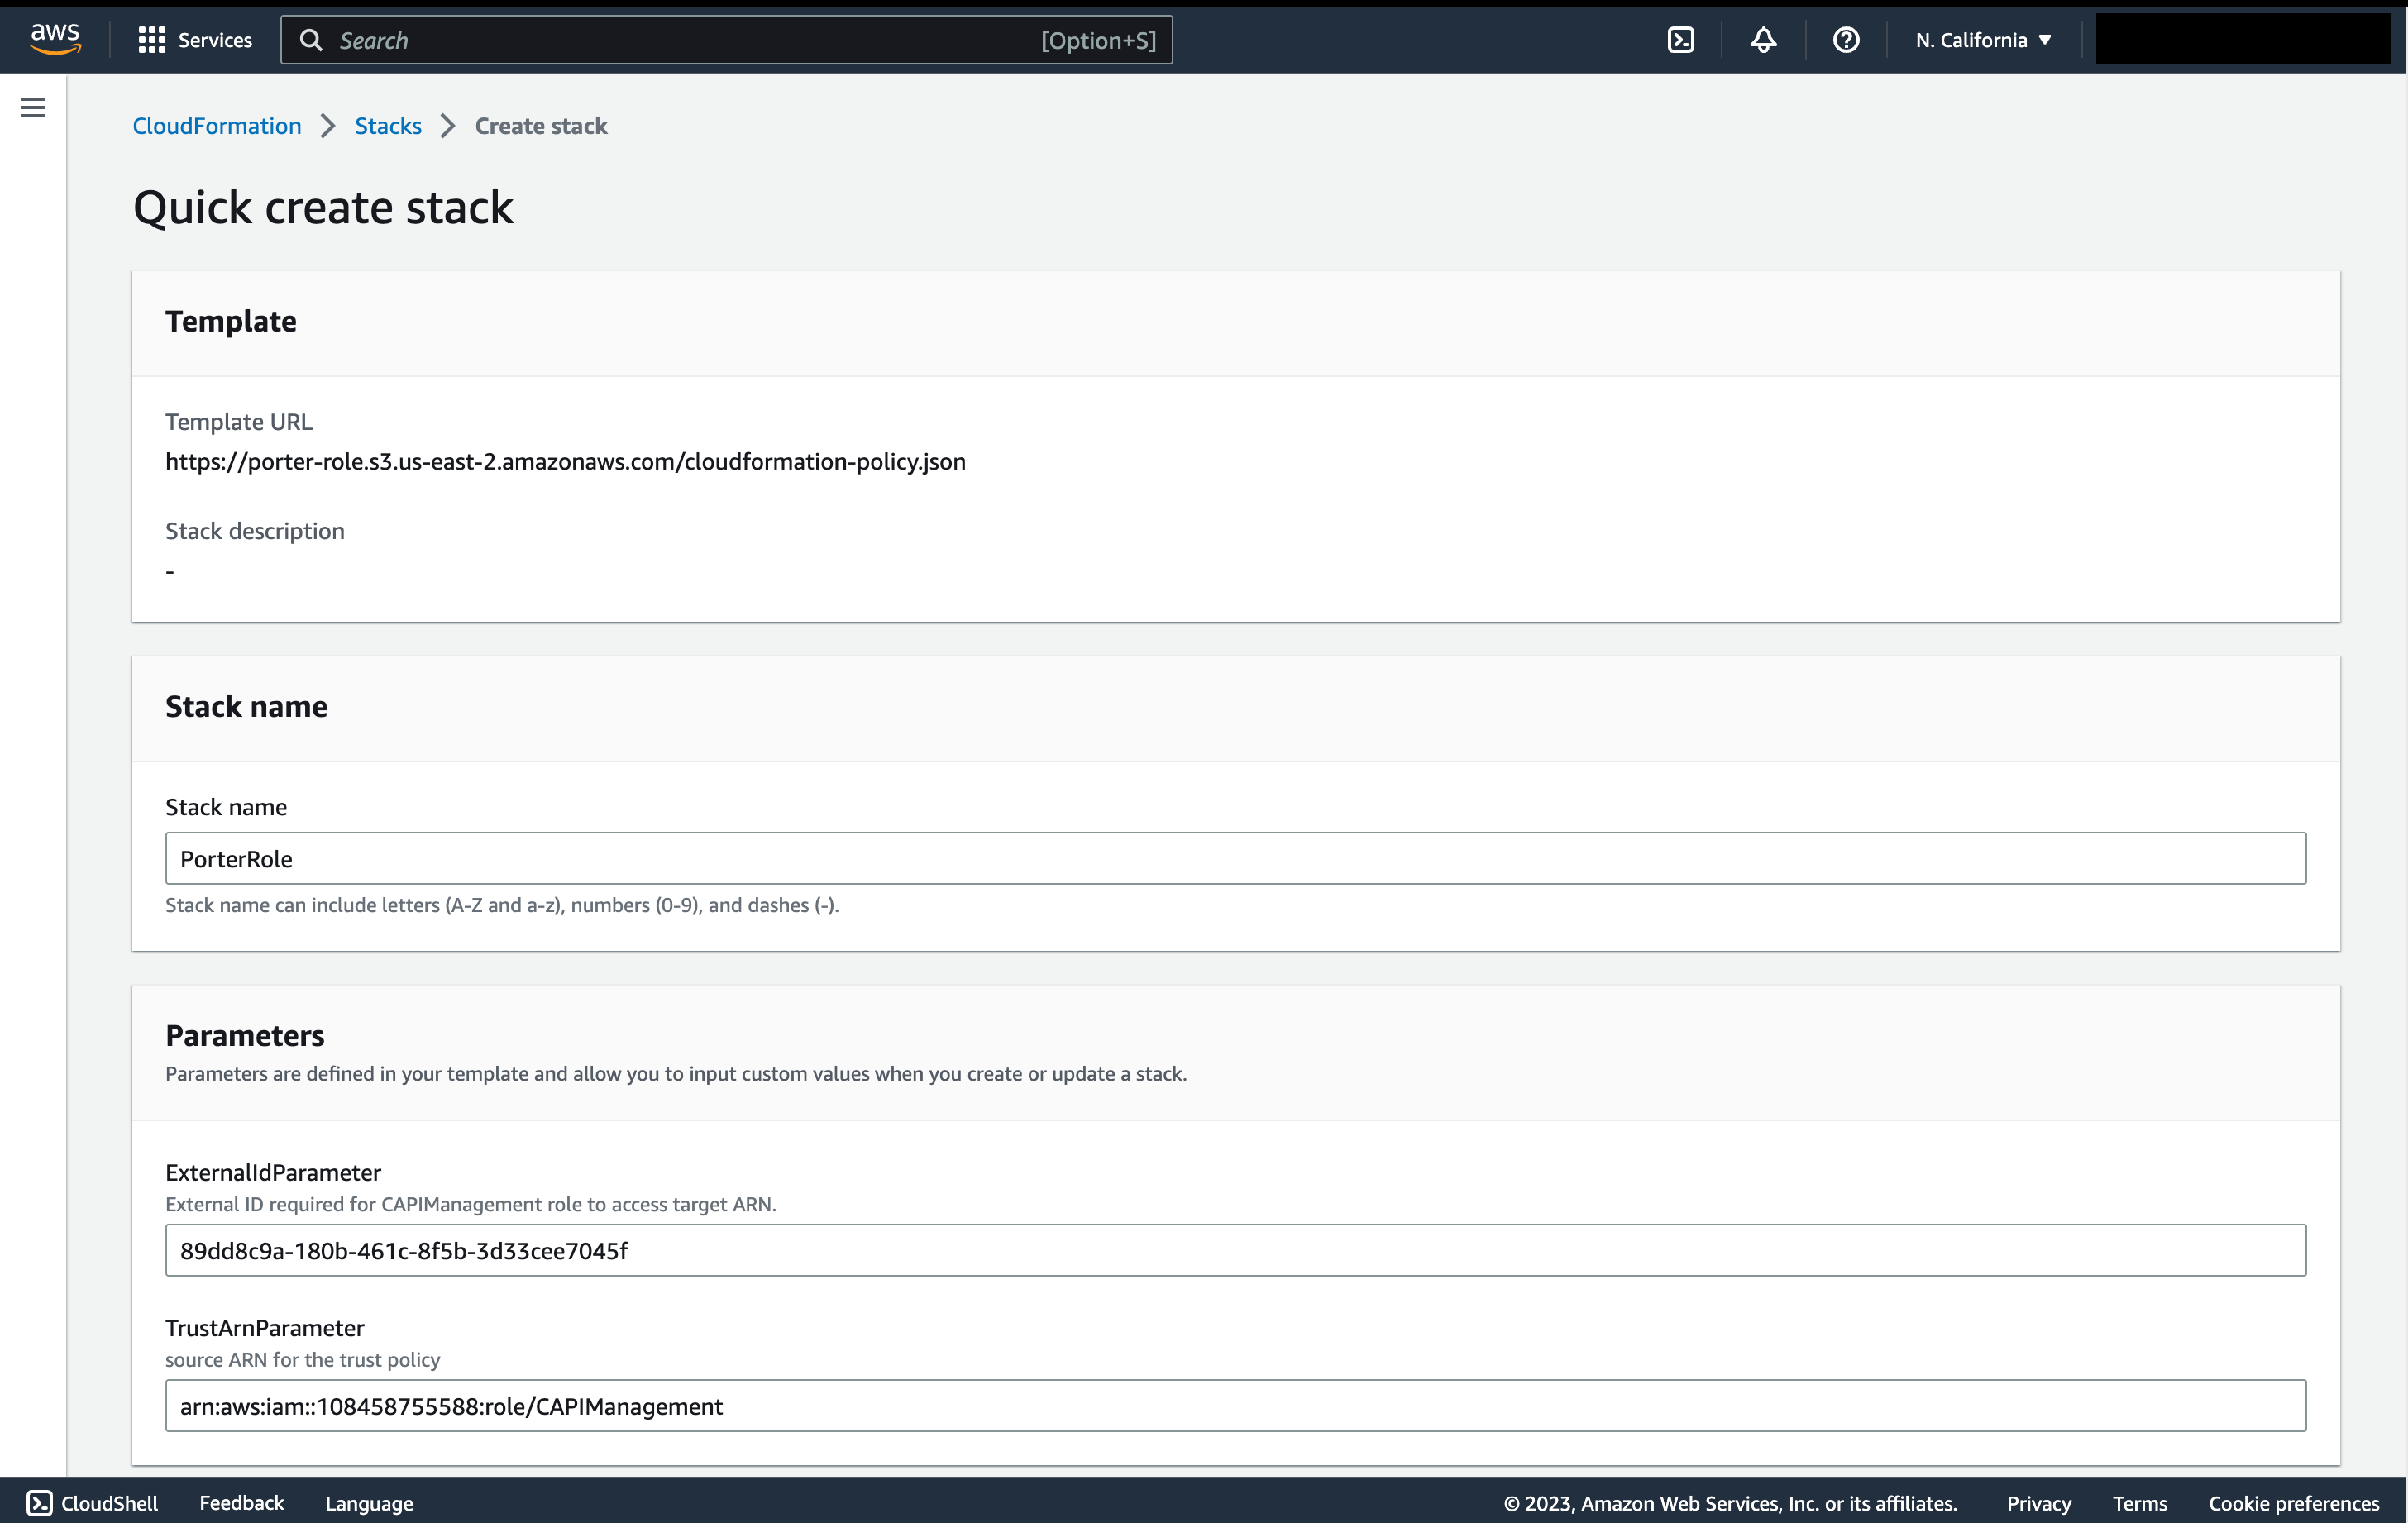
If you want to use Porter with less expansive permissions than what is provisioned by the CloudFormation stack, please contact us to inquire about Porter Enterprise. Porter Enterprise requires minimum IAM permissions that are smaller in scope.
- After creating the role, navigate back to the Porter dashboard and click Continue. You will be prompted to select the AWS region that you want to provision your infrastructure in. Porter supports all AWS regions.
If you want to inquire about enabling more advanced settings like changing instance types or enabling KMS contact us to learn more about Porter Enterprise before you provision your cluster. Porter Enterprise gives you more configuration options to customize the deployment of your cluster

- Before you are able to provision a cluster you must pass all provision checks as AWS imposes quota limits on accounts. Troubleshooting steps will be shown on the dashboard if you encounter these errors.

- Once you click Provision, Porter will start spinning up the requisite infrastructure in your account. This may take up to 30 minutes.
Once you click Provision Resources, Porter will install all the requisite resources in your AWS account using the IAM credentials you have created. This may take up to 30 minutes.
Deleting Provisioned Resources
For Porter to delete your resources, it needs the IAM role that was initially created during provisioning. Please make sure to delete the resources first, and then delete the IAM role after. If you’ve already deleted the IAM role, you will have to delete the resources directly from the AWS console.
To delete resources that have been provisioned by Porter, click on the Infrastructure tab on the sidebar of the dashboard. There you can find the Delete Cluster button.
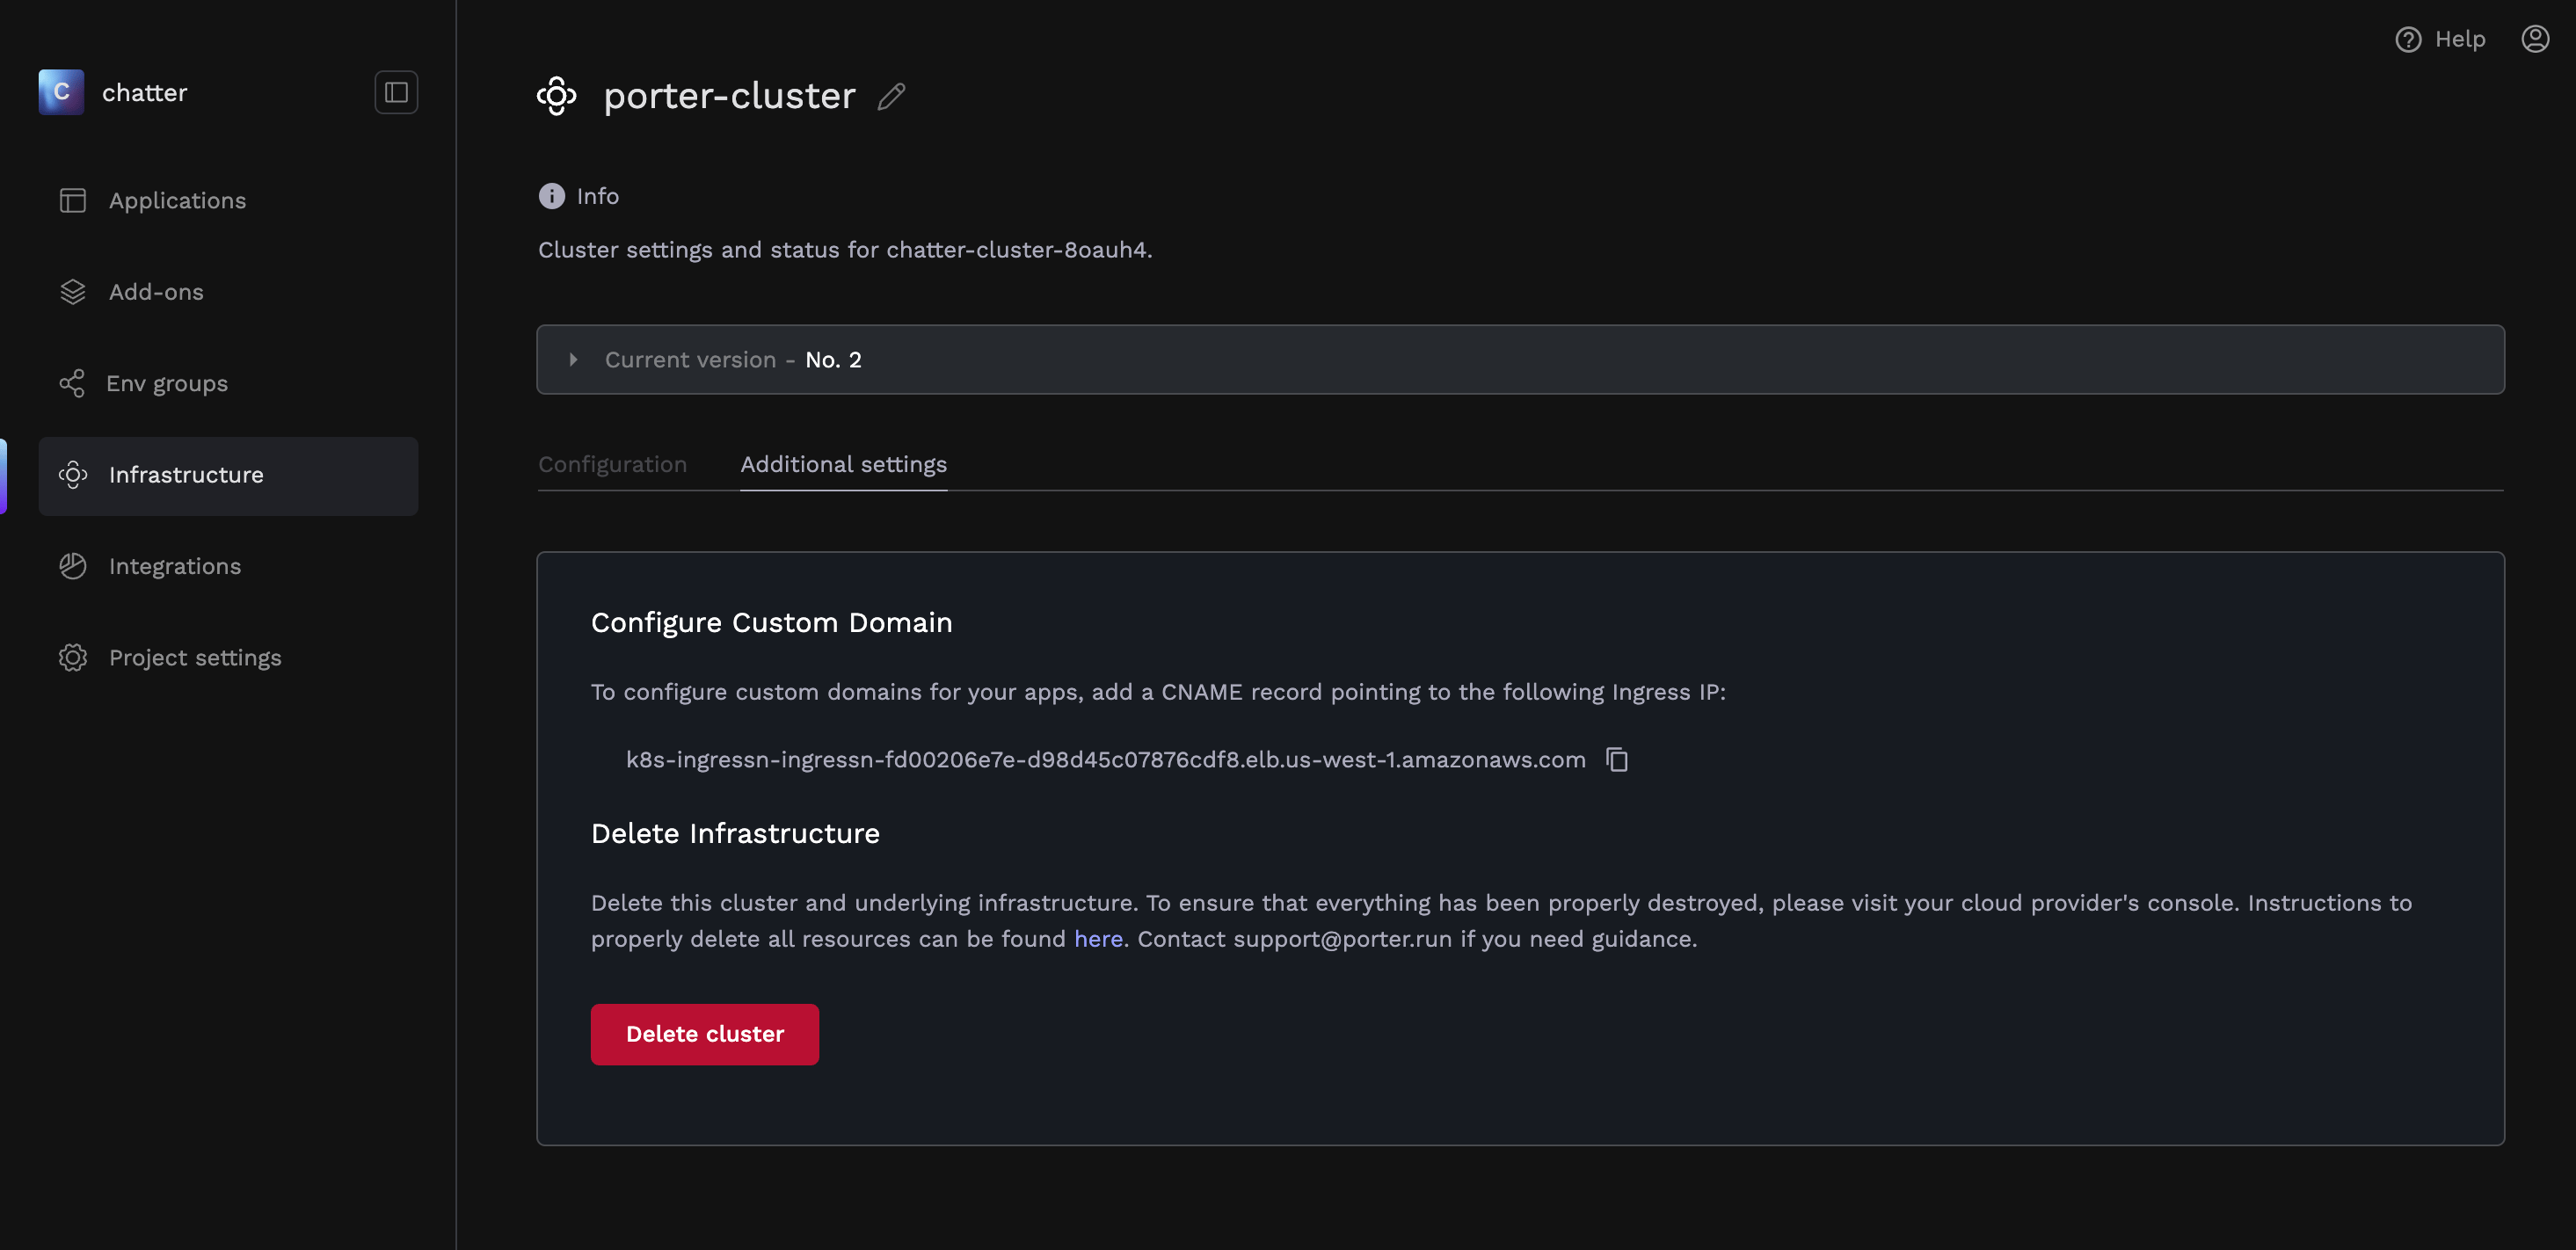
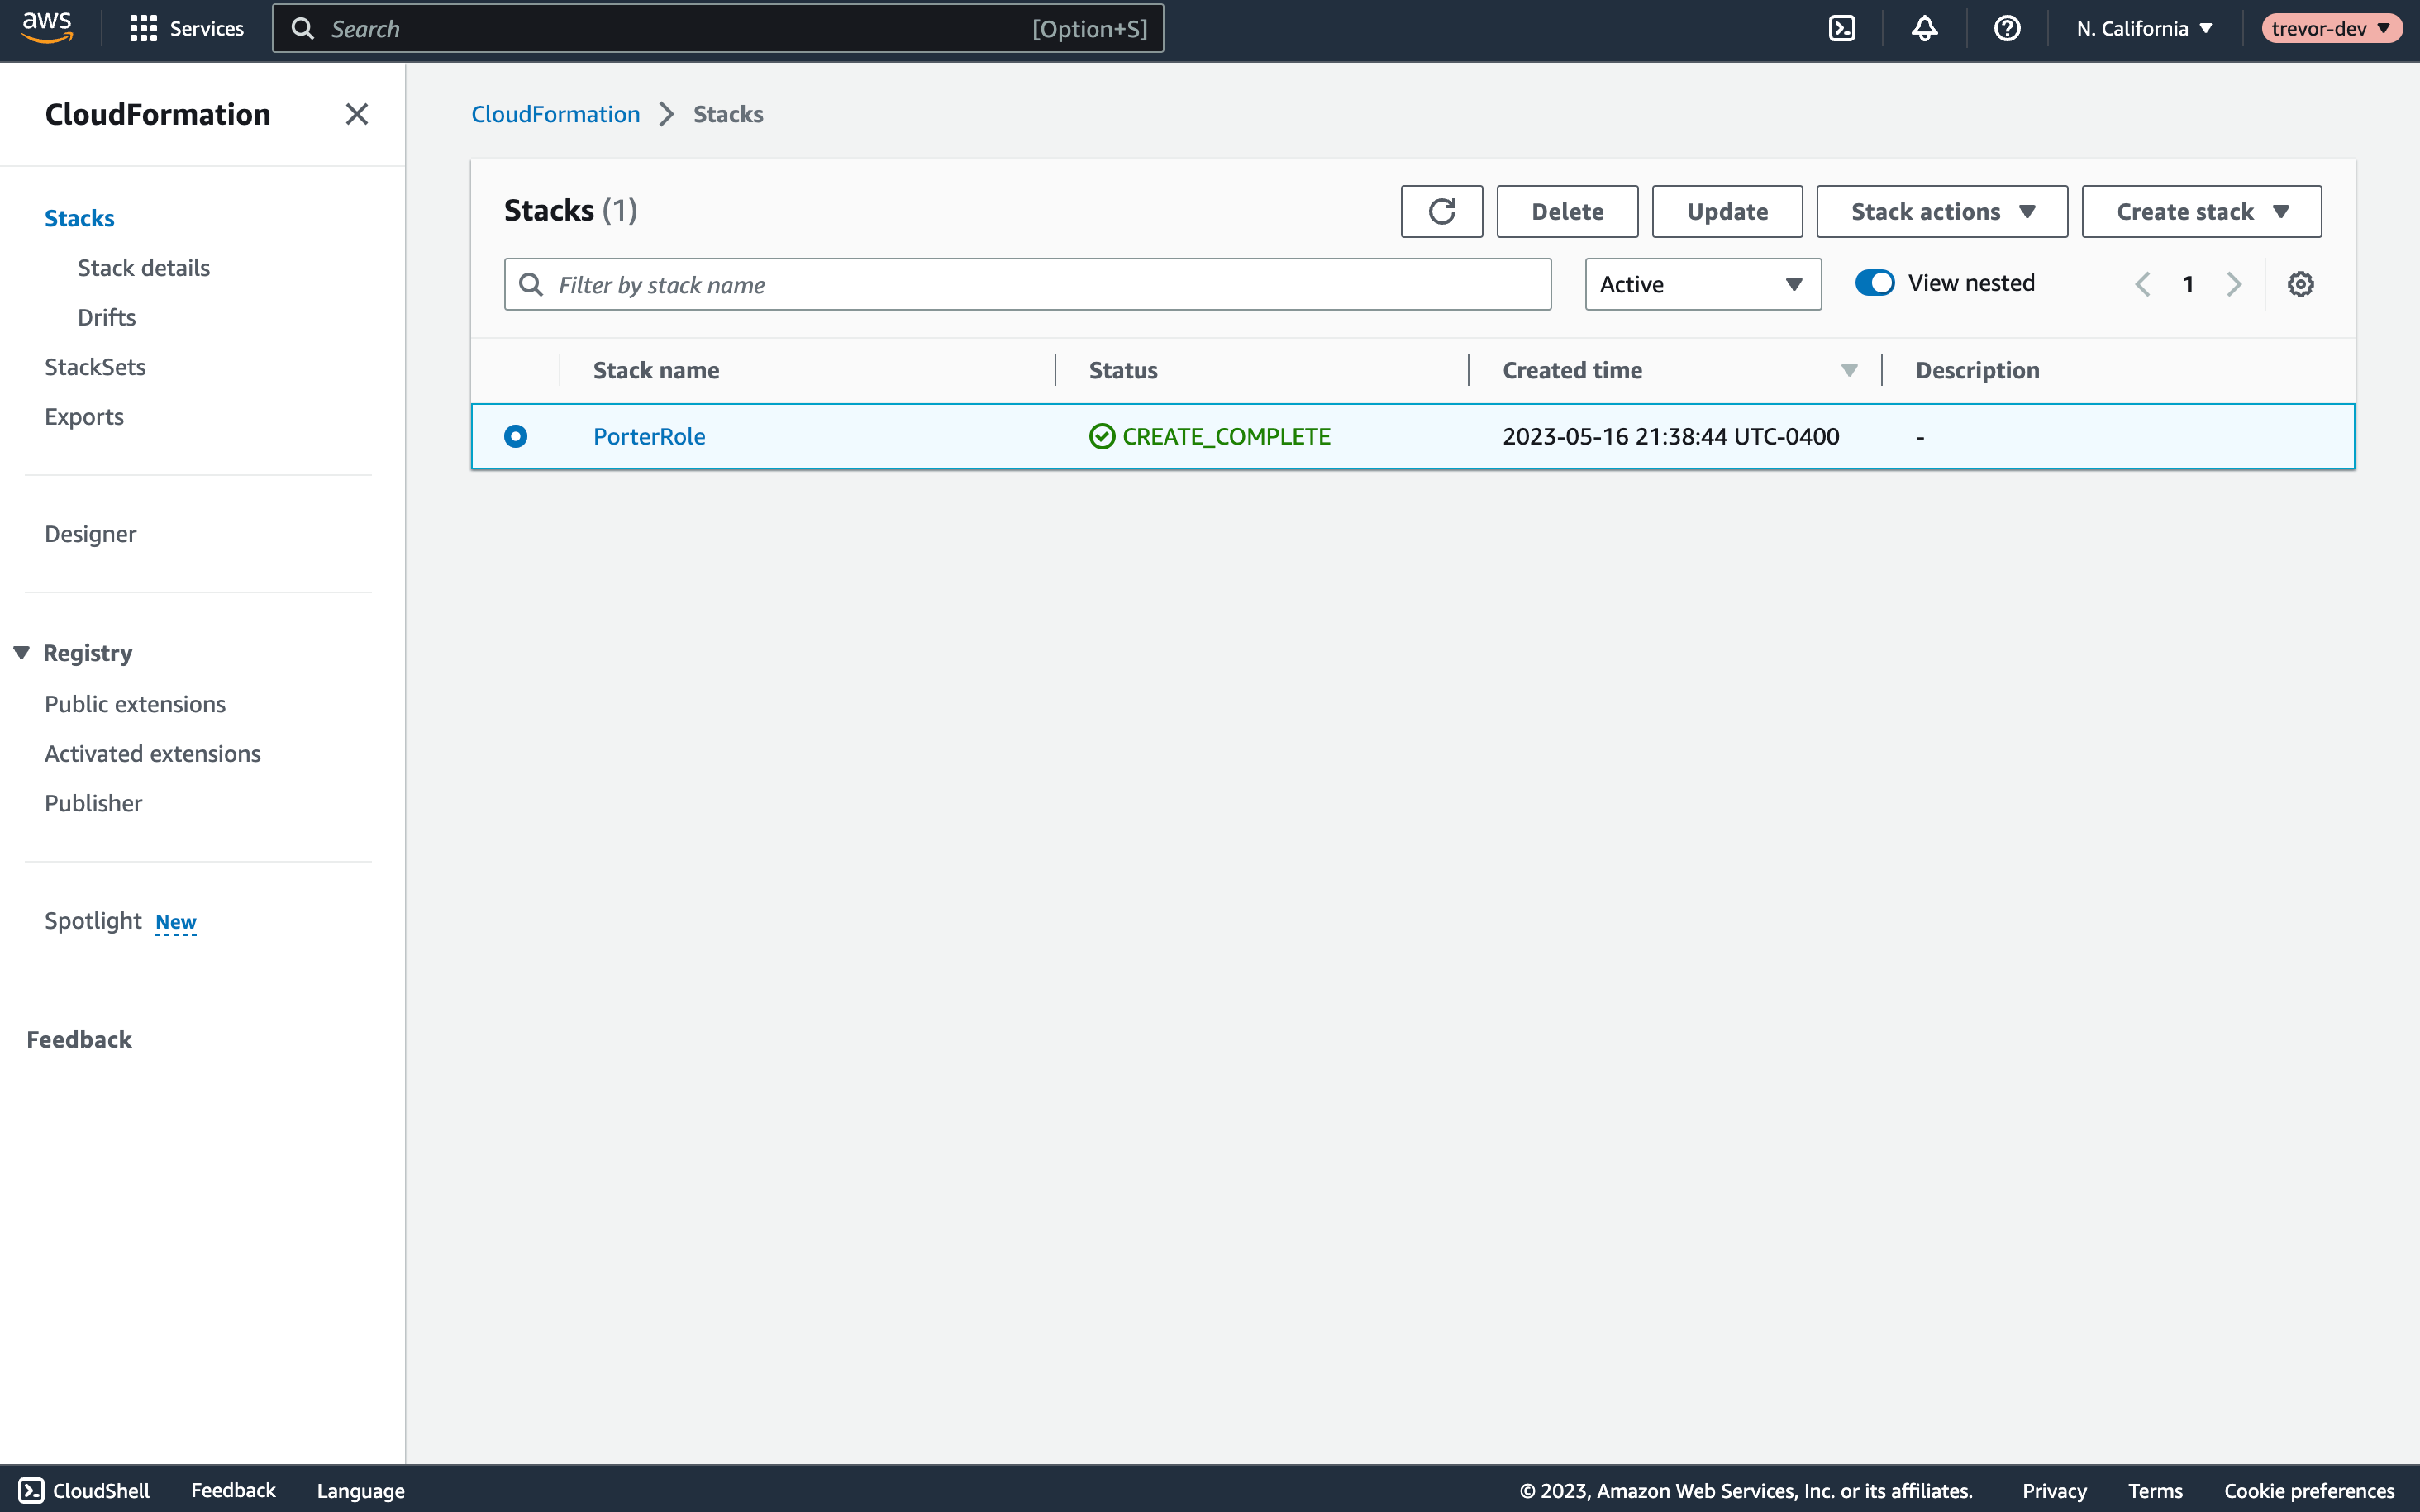
Once the cluster has been deleted, navigate to CloudFormation Stacks in your AWS console to delete the role that was created during initial provisioning. This will revoke Porter’s access to your account.
Select the stack named PorterRole and click Delete.
Deleting resources on AWS via Porter may result in dangling resources. After clicking delete, please make sure to check your AWS console to see if all resources have properly been removed. You can remove any dangling resources via either the AWS console or the CLI.
For a guide on how to delete the dangling resources, see Deleting Dangling Resources.