Deploy from GitHub Repository
Step 1: Select a Github Repository and Source Branch
Once you’ve installed the GitHub App, you will be prompted to select a repository that you want to deploy from. If you do not see the repository you want to deploy from, please update your GitHub application from Account Settings at the top right corner of the dashboard.

Step 2: Select a Branch
After you select the repository, you will be prompted to choose the source branch.
When pushes are made to the source branch, Porter will automatically build your application from the branch and re-deploy your application.
For example, if you are setting up a production environment, you might want your application to be deployed on pushes to the production branch.

Step 2: Select a Root Path
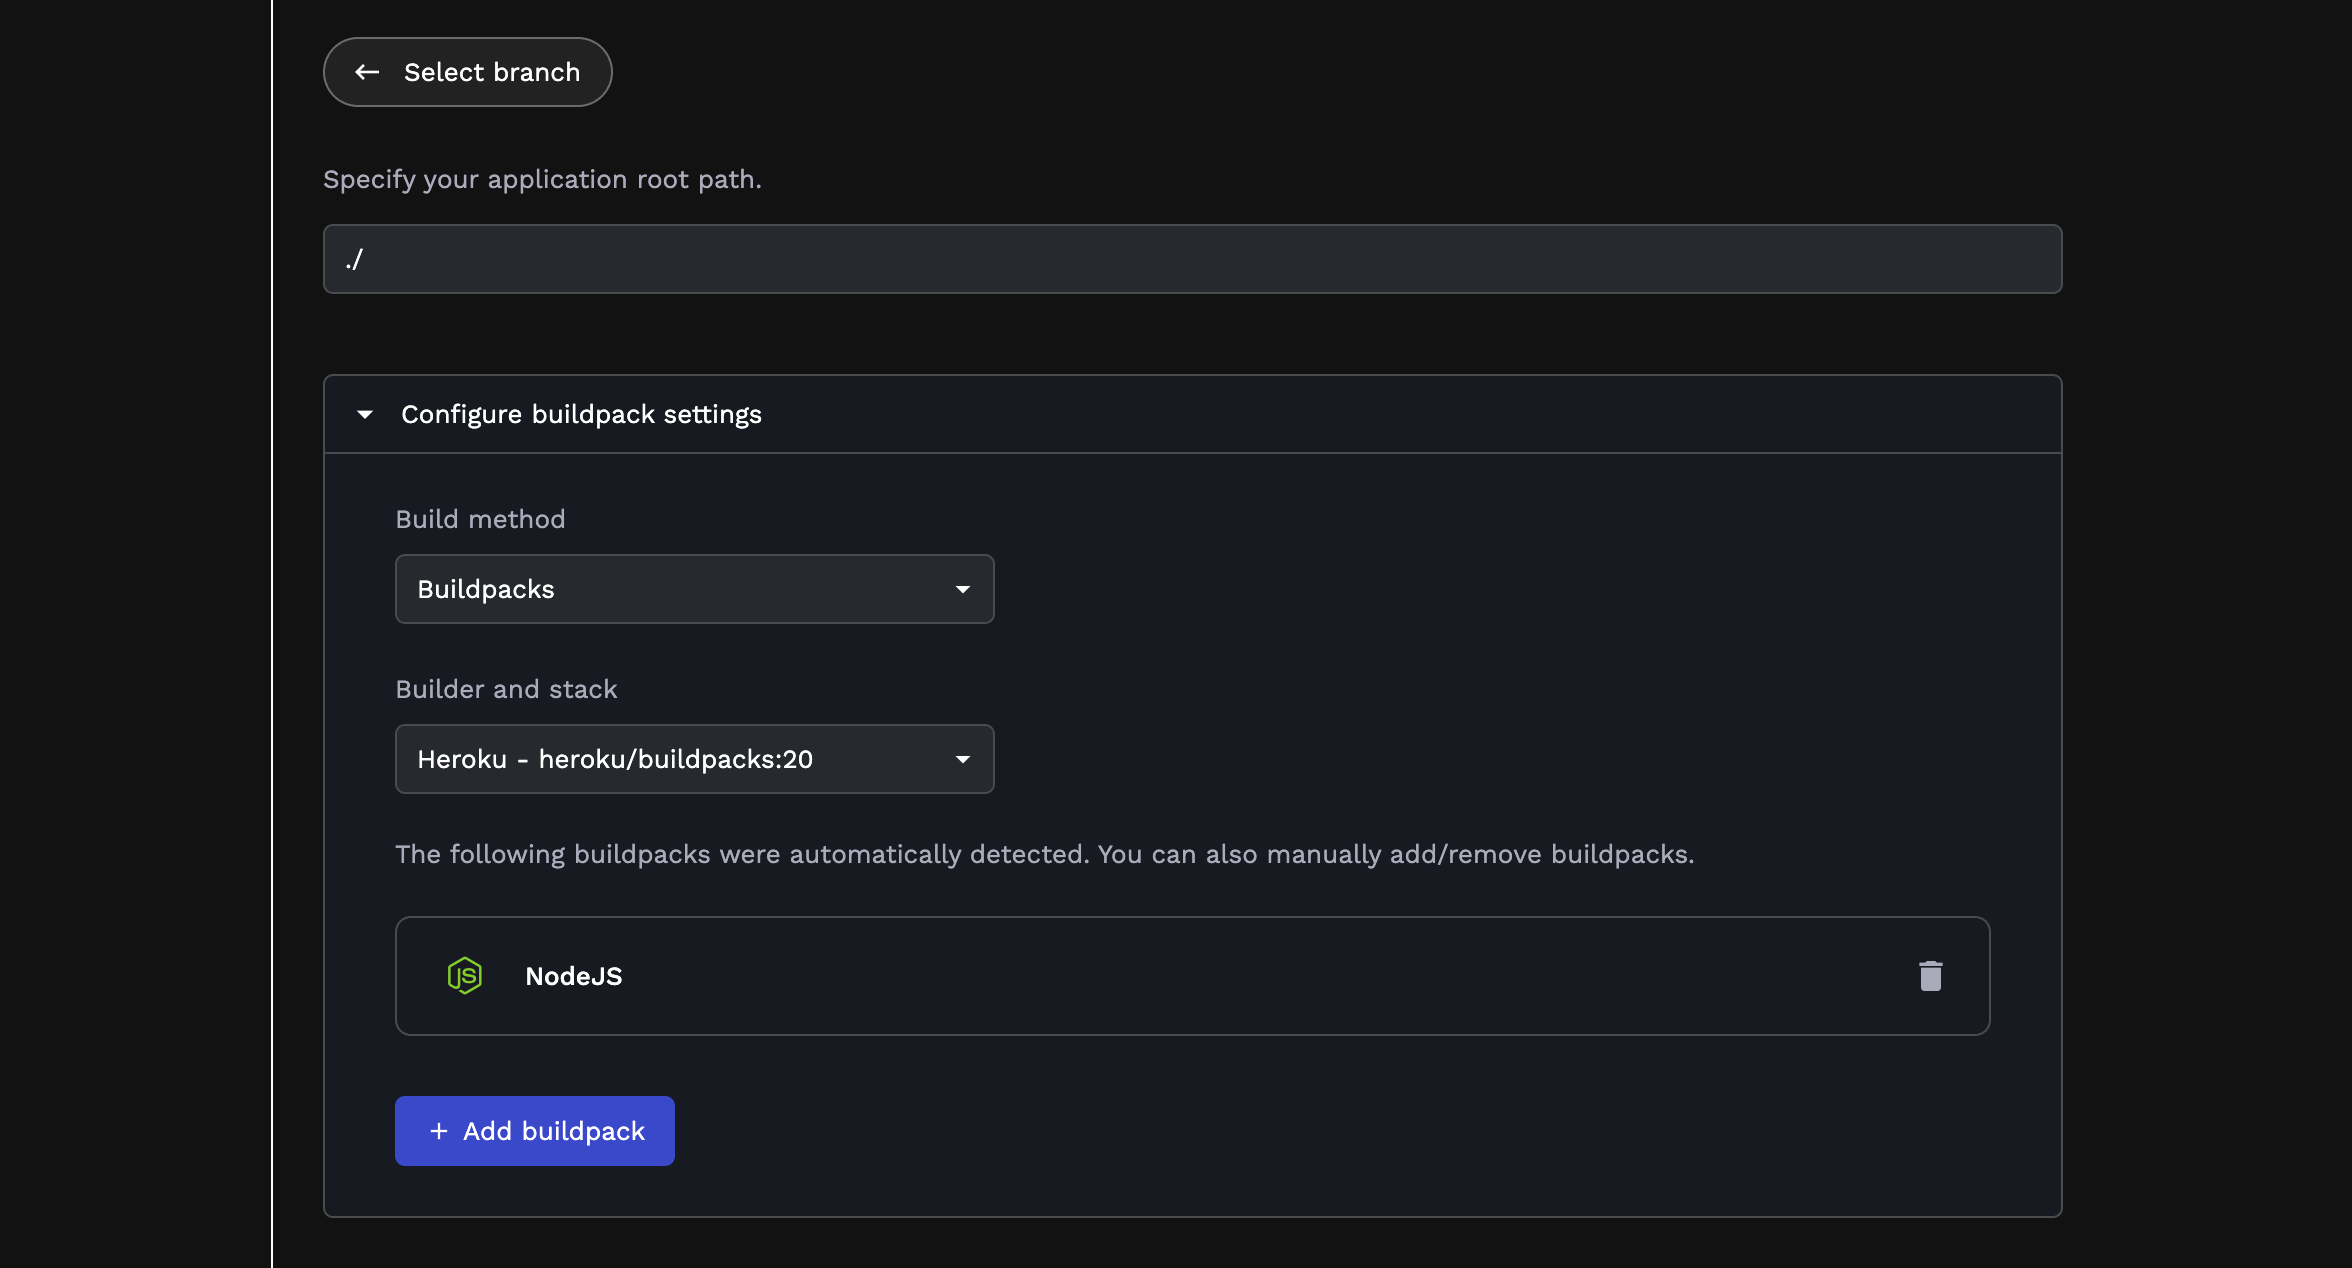
After selecting a branch, you will need to specify the root path of your Github repository. This is set to ./ by default;
however, if your repository is a monorepo, you will need to specify the path to the subdirectory from which you would like your Porter application to be built (e.g. ./backend).
Step 3: Specify a Build Method (Optional)
Porter supports two ways to build your application: Docker and Buildpacks. After you select a branch, Porter will automatically detect whether your repository contains a Dockerfile in the root path and build your applications using the ./Dockerfile.
If your application is not containerized with a Dockerfile, Porter will use Cloud Native Buildpacks to build your applications. Porter supports Heroku Buildpacks
as well as Paketo Buildpacks - in both cases, Porter will automatically detect the languages and frameworks in your repository to determine which buildpacks are necessary to build your application.
The build method will be automatically configured, but you can make manual changes to these settings if necessary by expanding the Configure Build Settings section.
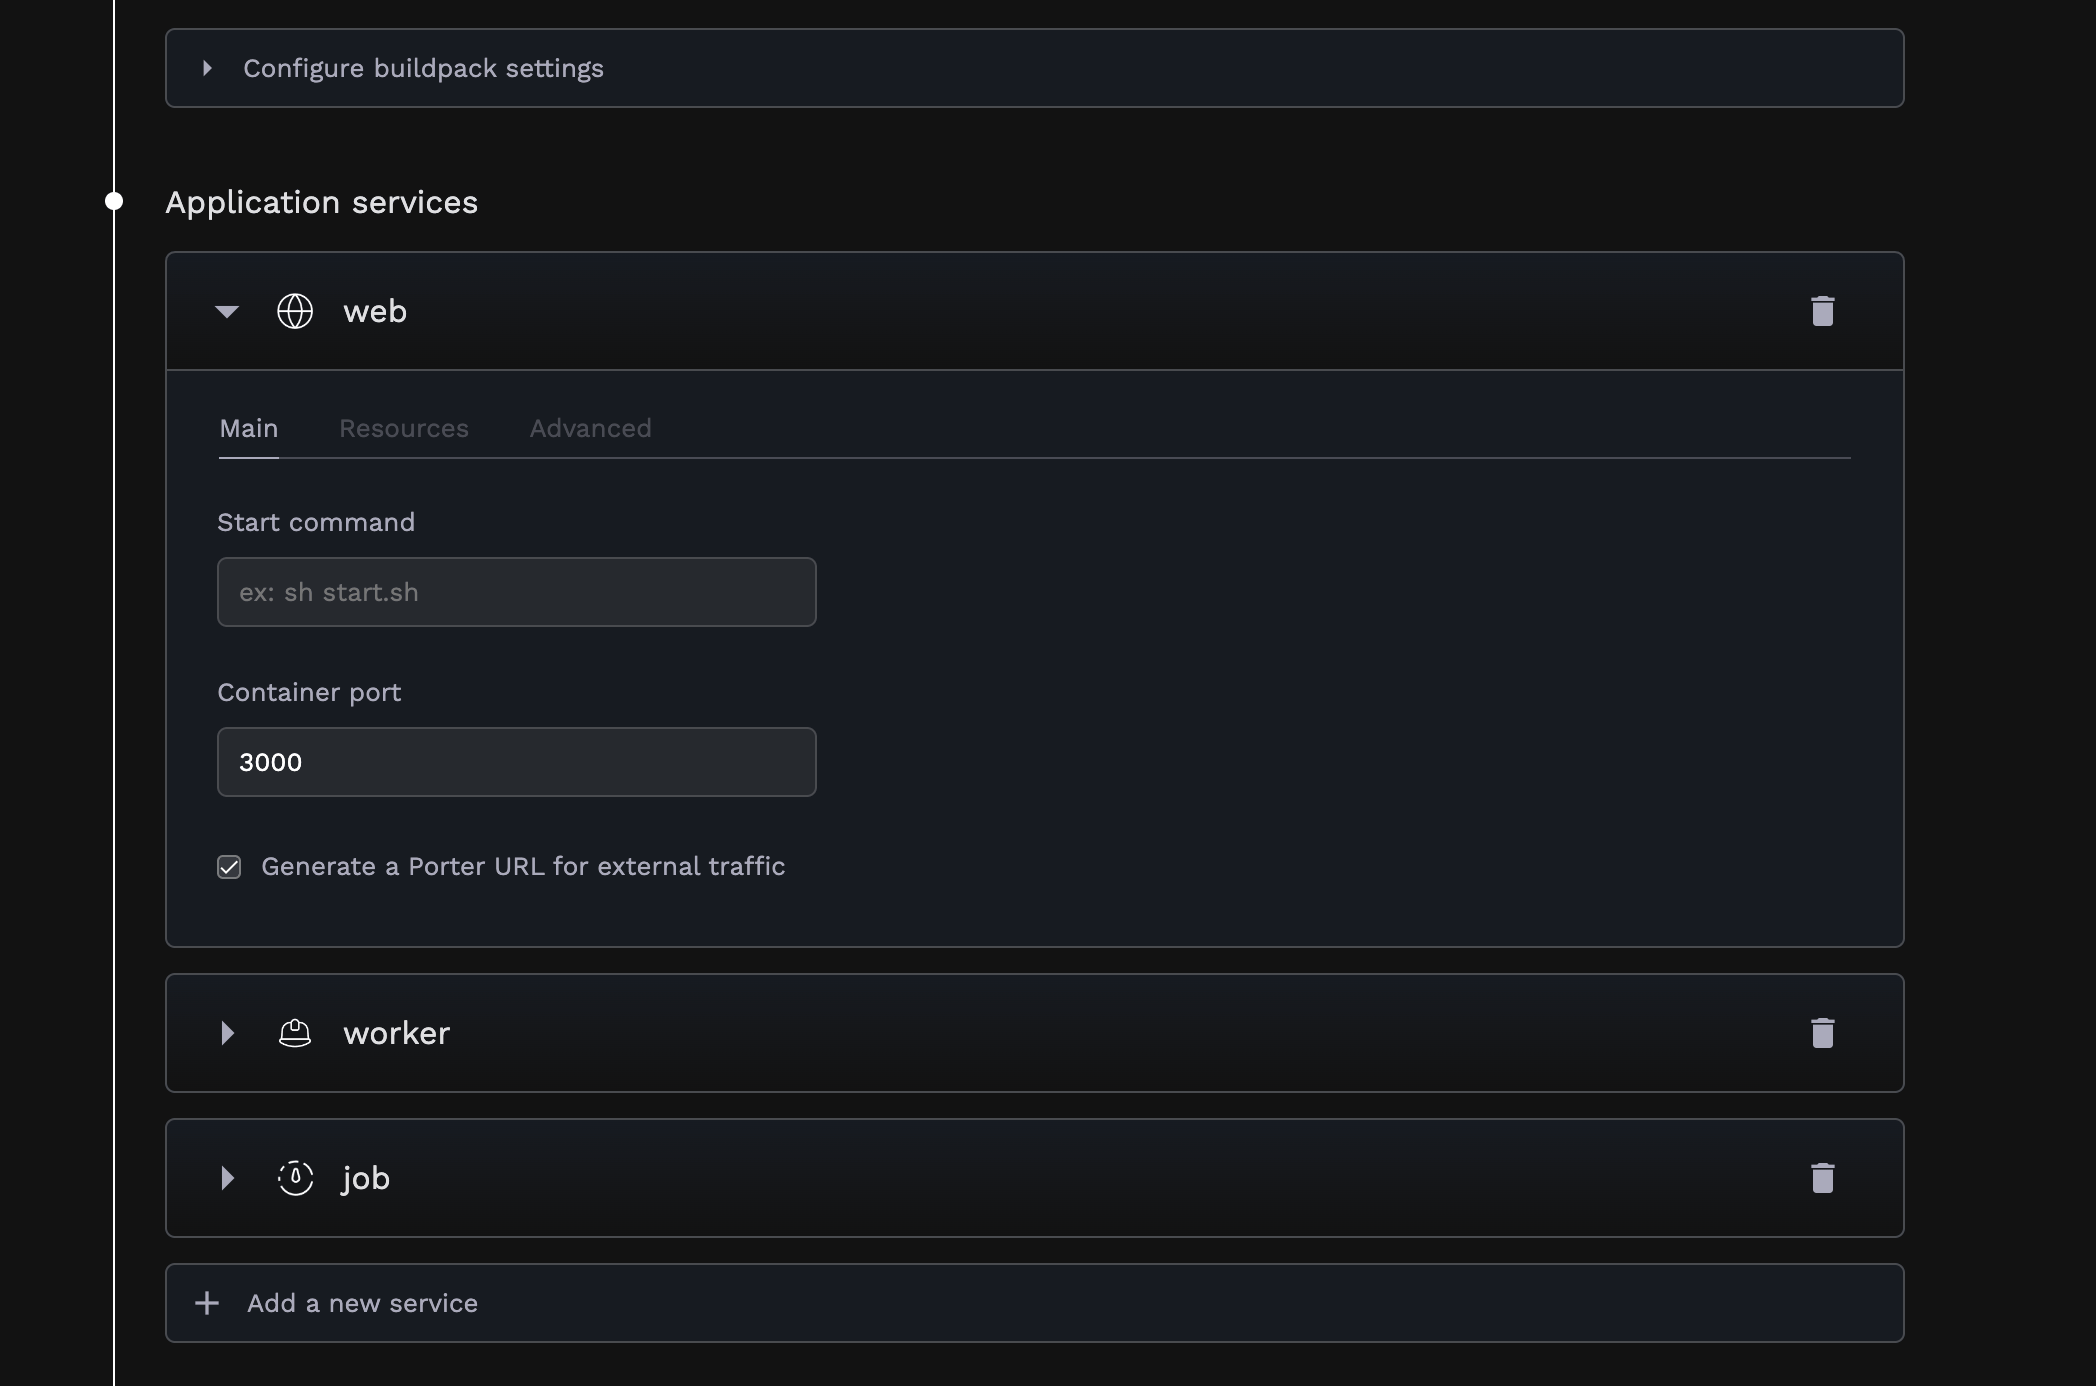
Step 4: Add Application Services
You can now add services to your application, which will be deployed together once your code is built. Porter supports three types of applications: Web, Worker and Job. See here for more information about the difference between service types.
If you had written a porter.yaml file as outlined in the Writing a porter.yaml guide, you should see this list populated with the services you defined in your porter.yaml file. Any settings you specify for your services in your porter.yaml will be read-only in the Porter UI.
If you would like to make changes to your services, you will need to make them in your porter.yaml and push them to your repository. Note that writing this file is is optional.
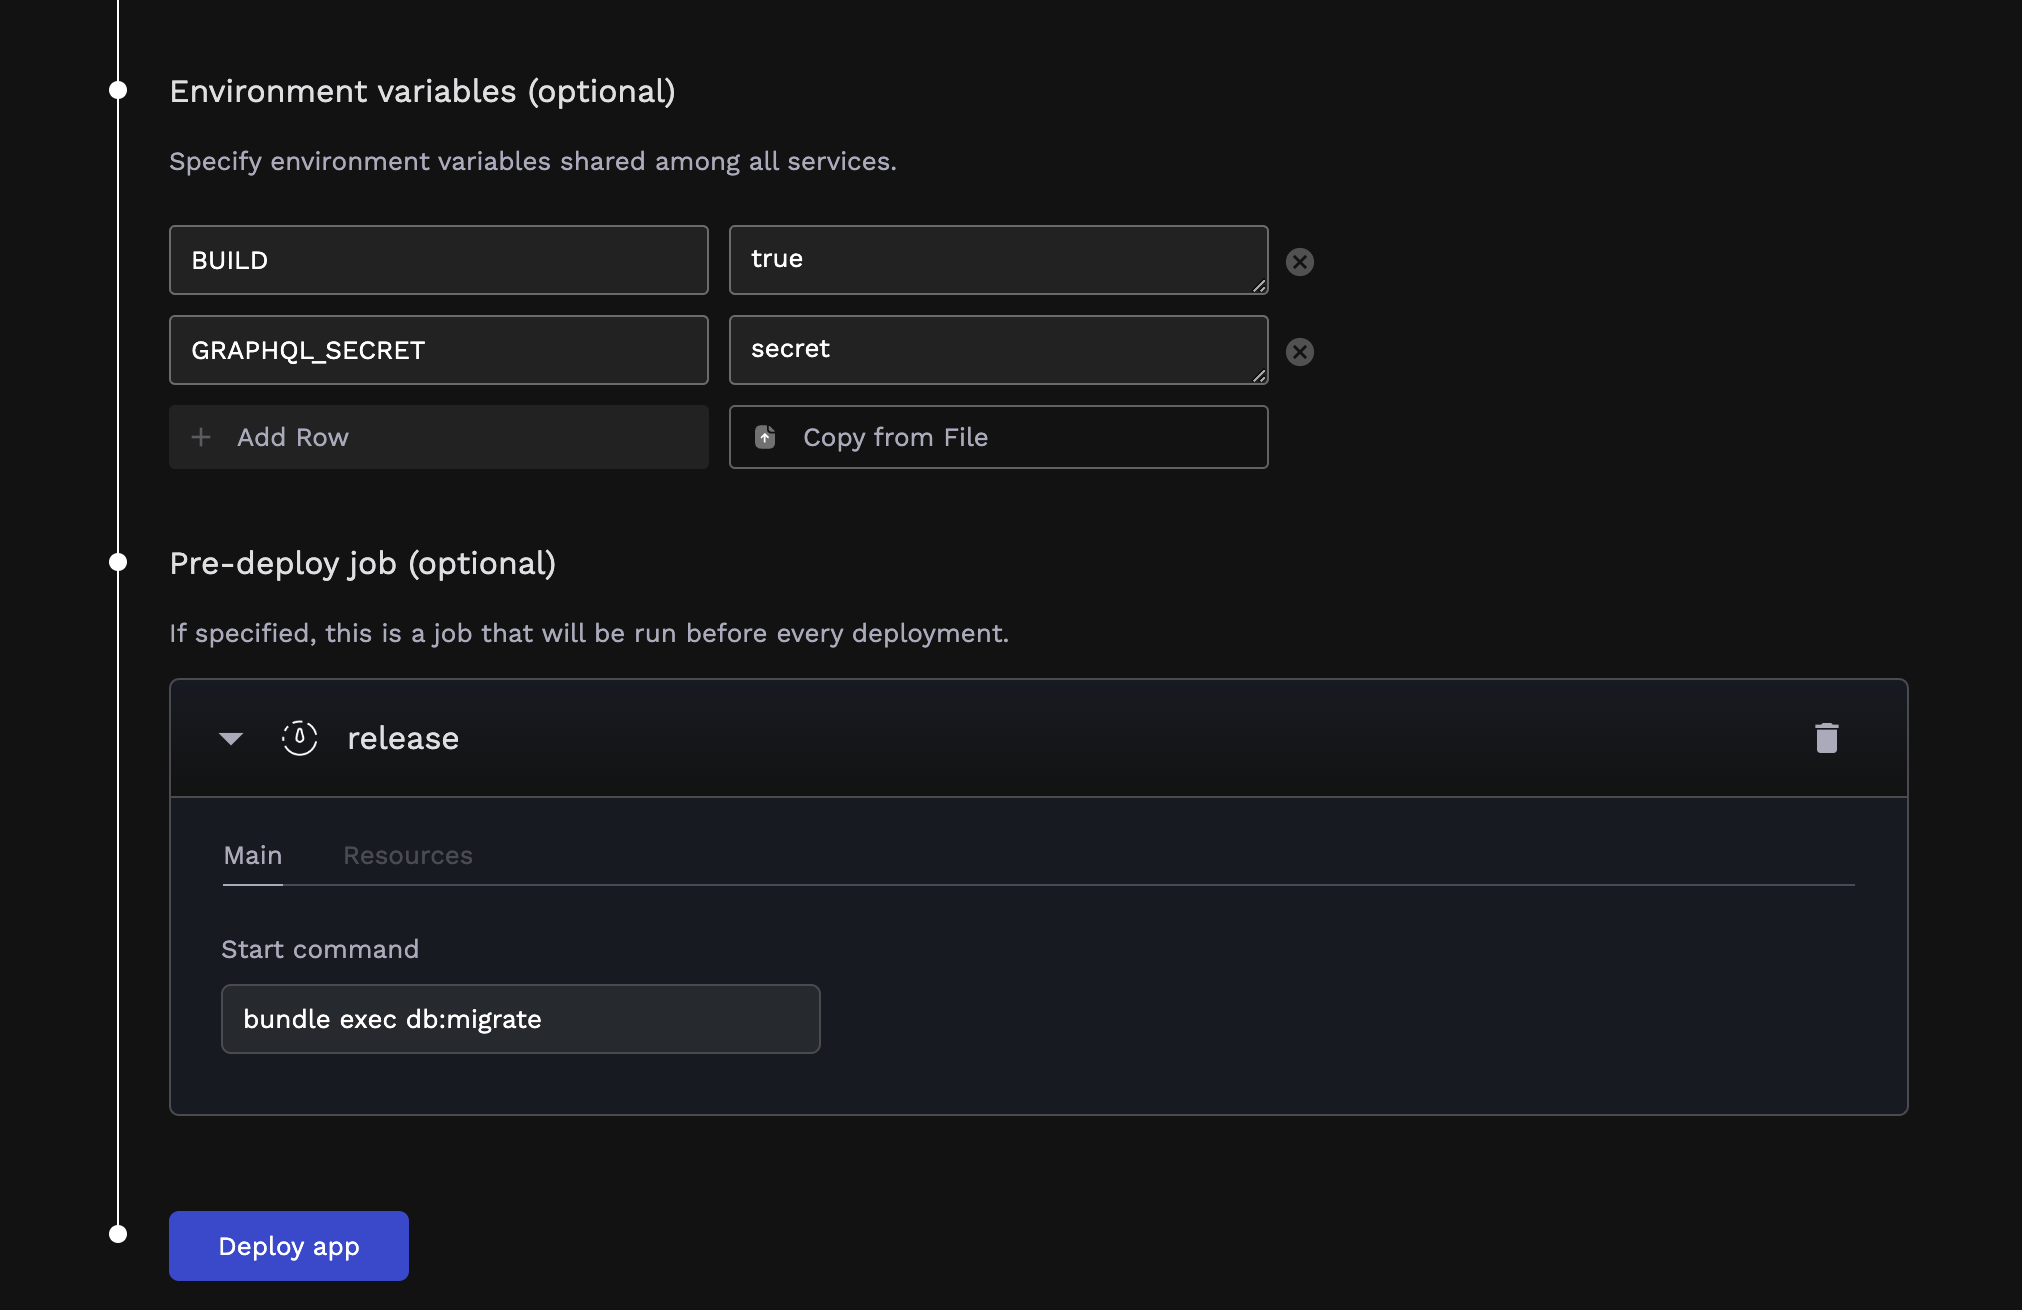
Step 5: Add Environment Variables (Optional)
After adding services, you can add environment variables to your application. These environment variables will be available to all services in your application. In addition, if there are any environment variables required to build your code, specify them here.
Step 6: Add a Pre-Deploy Job (Optional)
You can also add a pre-deploy job to your application. This job will run its start command before your application services are deployed, and can be used to run database migrations, seed your database, or perform any other tasks that need to be completed before your application services are deployed.
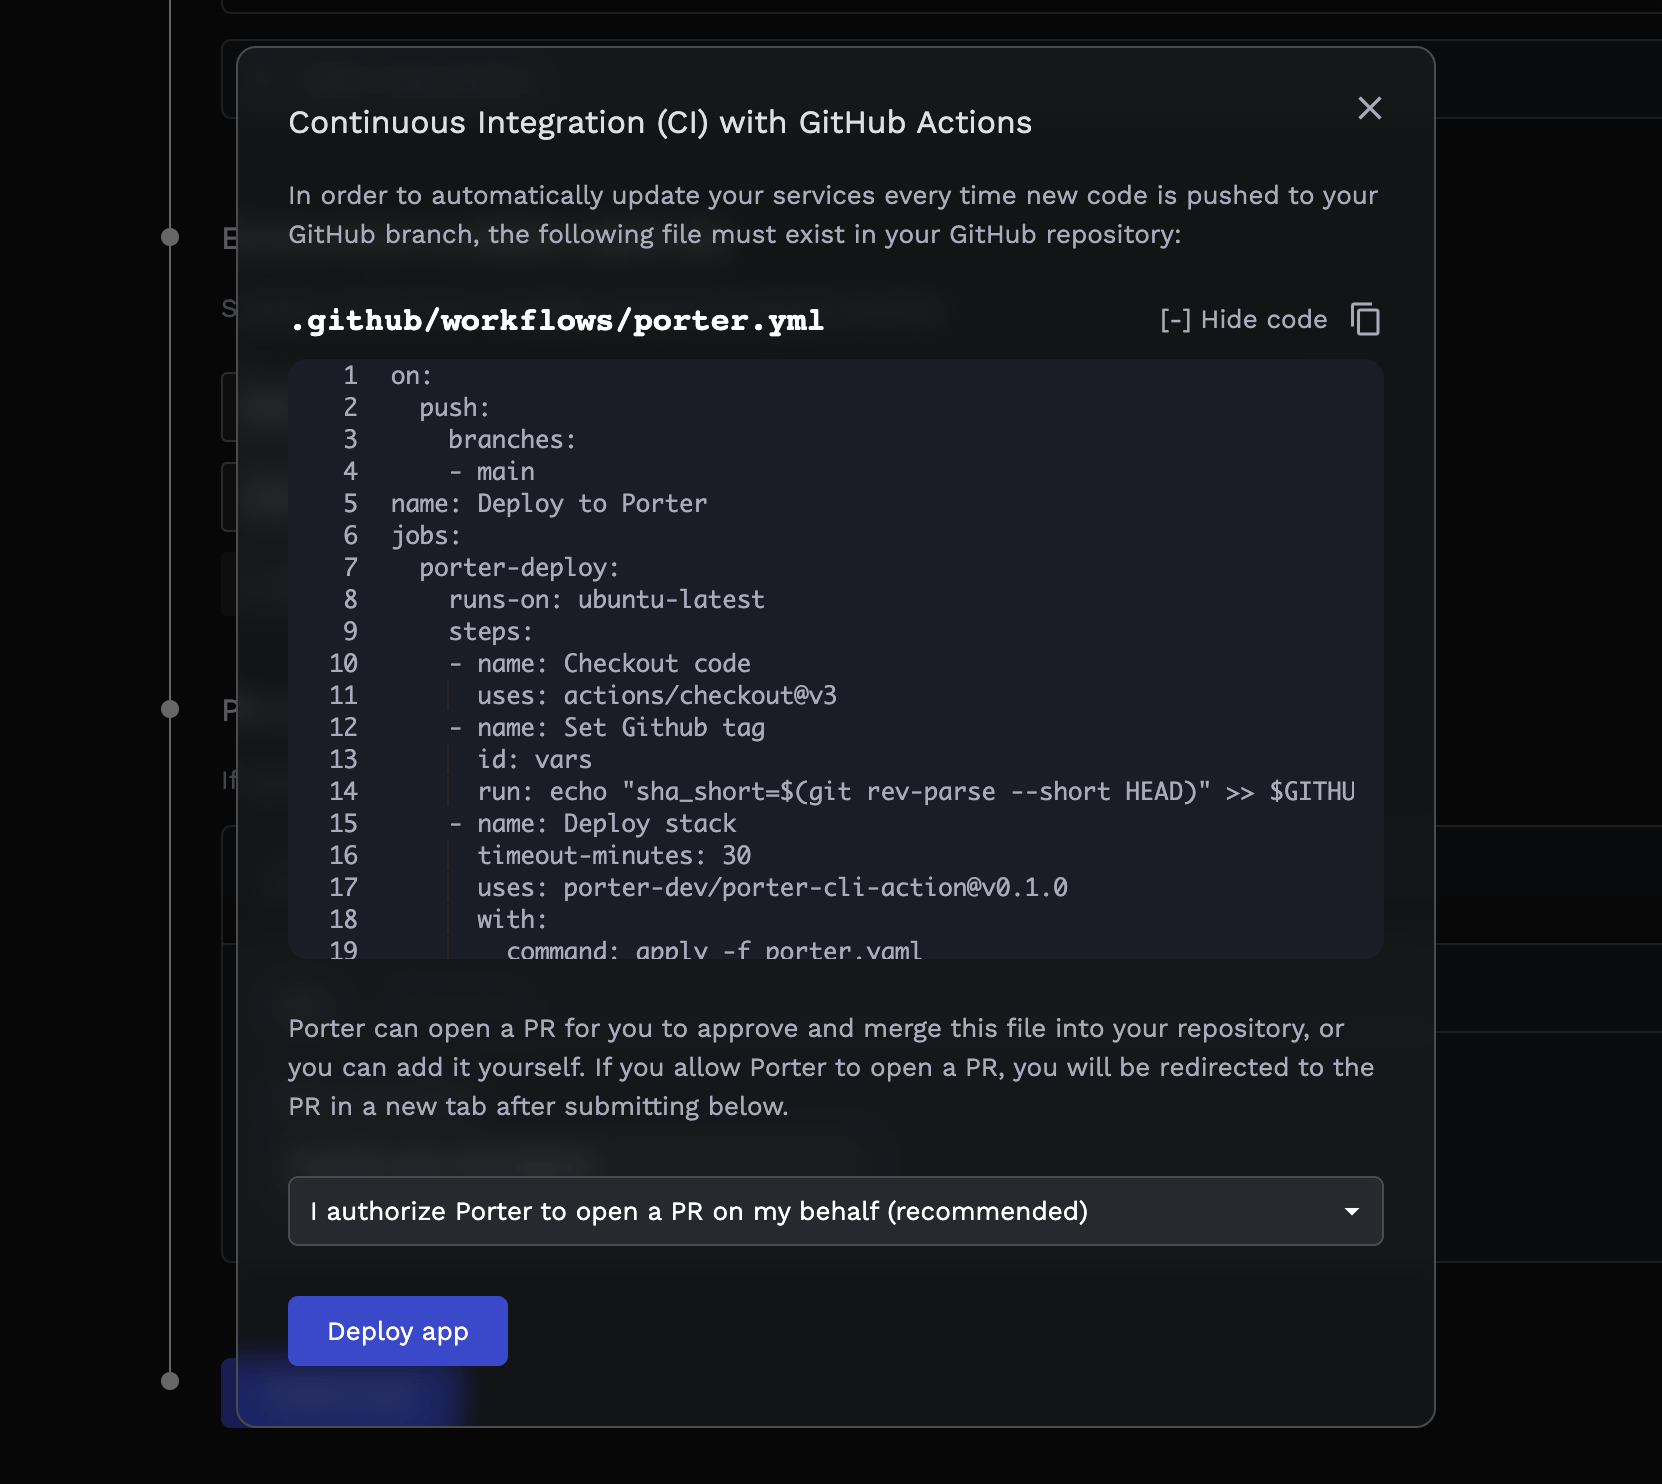
Step 7: Set Up CI/CD through Github Actions
Porter handles CI/CD for you, but Porter does not run the CI/CD pipelines on its own. Instead, it runs your build process on GitHub by writing a GitHub Actions file in your repository. After clicking the Deploy app button, you will be prompted to authorize Porter to open a PR in your branch that contains the said GitHub Actions file.